- Be responsible for your props/costumes
- Take into account weather/room availability
- Extras can be unreliable
- Student office may not lend you the wheelchair if not booked
- Back up plan if star is absent
- If footage is moved from computer, premiere will not find it
- Keep it simple, do not over complicate
- Diplomacy and compromise are essential team skills
- Continuity errors
- Change settings when importing footage
Alone

AS Film Opening
Friday, 25 October 2013
What we learnt from our Prelim Task
Wednesday, 23 October 2013
A Day in the Life AS Media Marking
I chose to mark 'A Day in the Life' as the text on the image above made me think that they had put lots of effort into their film. I liked the way that the text was placed in different areas and I also liked the way they made the mirror show differently to what was actually happening. I found the bit when he left the house a bit long and boring but otherwise good. I would score this a level 4 and would give it 52 marks.
The Run AS Media Marking
I chose to look at 'The Run' because the title intrigued me into watching it. I liked the way they used the school science lab as a set. I also liked the way he had a Bunsen burner going in the background to make it seem more realistic and make you realise that you are in a science lab. I also liked the way that they ran through the estate jumping from railings and over walls. I would give this a level 4 as I thought it was really good and imaginative. I would score it 50 as there are some areas to be improved, for example the voices were a little quiet.
Thursday, 17 October 2013
Iron Man Opening Analysis
Camera
The first camera shots starts inside an army convoy. It is a shot that is looking through Tony Starks eyes. We can see what he is seeing when he is being escorted through an area. Most of the shots are close ups and medium long shots. This given the impression that there are cramped in the car and there is not much room to move. When the car in front blows up there are lots of quick cuts and changing of camera angles. This shows that how quickly an attack can happen and that if you are not ready you will most probably not survive.
Mise En Scene
The setting is in an open space inside and army truck. They used props such as a camera, guns and a explosive rocket. The colours are mainly the same colour of the army camouflage so that they blend in. At the end of the opening, Tony has lots of cuts all over his face. This make up would have taken hours to prepare. The sound is all diegetic as we can only hear the explosions and talking that Tony can hear.
Sound
The sound is all diegetic as we can only hear what Tony can here. As tony gets hit by the rocket the sound slowly fades out making him feel alone as he is in the middle of nowhere and his bleeding heavily.
Editing
The opening of the film mainly has straight cuts. When the rocket hits Tony, all the sound fades out so you can only hear him breathing. The camera then zooms and fades out taking us to another location. I thought that this was really good because all of the straight cuts were fast as that pace to show the explosions but when he gets hit, the camera slows down to show that he is dying slowly and we don't know if he will live.
Friday, 11 October 2013
Prelim Task 'The Encounter' and Learning to use Prezi
Here is the plan for my prelim task. I used a website call Prezi instead of a PowerPoint presentation. We were given the genre Sci-Fi and we had to come up with the storyline. We chose a Men in Black style film where humans fight aliens instead of making a film about alien life. We had to come up with a title for our film. This took a very long time as the title is very important to the film. If the title doesn't attract people to watch it, then the film will not make very much money. We then had to create a story board, a script and a shooting schedule. All of these you can see in the Prezi presentation above. Overall I was very impressed with the plan for our film.
Toy Story 3 Opening Analysis
Camera
The first shot is a crane shot that swoops through some rocks and onto the train. There are a lot of close ups of faces and there are also some long shots like when the train falls off the bridge and when Buzz Saves the train. There is also a zoom in on the TNT on the bridge. When the Spaceship comes over the canyon, the camera moves up into the eye of the pig and then into the control section. I thought this was a good idea instead of just having a straight cut.
Mise En Scene
The setting for the first scene is Andy playing with his toys, although the audience does not know this yet. It is Andy's story brought to life. It is set in a large canyon with a western theme. They seem to be the only people around for miles. The opening has lots of bright colours. This emphasises how happy Andy is in his room playing with his toys. The characters have a few props like whips and eye patches.
Sound
In the opening there are both diegetic and non diegetic sounds. We can hear the train and the characters talking but we can also hear music to help emphasise the train scene and when the train falls off the bridge. This helps the viewer to feel the correct emotion from the music.
Editing
As the film was made by computer most of it was edited but items like the force field and the explosion from the TNT on the bridge were over exaggerated to seem like a bigger disaster. Also when Jessie calls Rex, the ground shakes and opens to let him out of the ground.
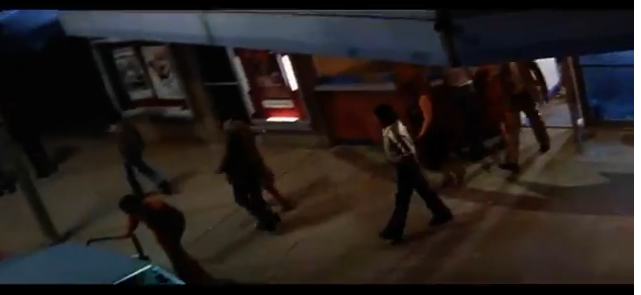
Saving Private Ryan Opening Analysis
Camera
The first shot shows the soldiers in their boats heading towards land to fight. The camera moves up and down when showing the outside of the boat as if you was looking across from another boat. The camera moves along with the waves to make you feel as if your in the boat opposite. The camera then starts at the back of the boat and zooms out to the front showing all of the characters on board. This close up shot shows the expressions on the faces of the soldiers and how they are reacting to the situation. For example two people throw up and the shot zooms out. When the leaders start talking you see that as if you are stood next to the speaker. When the boats hit land, the camera moves up to behind a German turret. From this shot you can see the amount of boats coming in and the size of the beach and how very little spaces there are for the troops to hide from gun fire.
Mise En Scene
From the first shot we can tell that this film is about war. When the boats are sailing towards the beach you can see the traditional green camouflage and army helmets. You can also see a few weapons. The scared expression of some of the soldiers faces also help you to understand the situation. The colours are dark, the dark green colour of the uniform and the shadowy boats block out most of the light in the boat. This gives a nervous and sad feeling to the viewer. As the film starts the date is shown, this is to show the audience when and where the film is set. This date was a significant date to World War 2 as it was D-Day. The props used were mainly guns but before the soldiers hit land you see a few of the soldiers pull out crosses and pray.
Sound
As the film starts all you can hear is the sea and the waves crashing on the beach. This makes you feel alone as there is no one on the screen and you seem to be on a deserted beach. Like with the camera shots, we have the sound of what the soldiers can hear on the boat. This is called diegetic sound. This carry's on through the whole of the opening with the sergeant shouting and the gun fire.
Editing
The film switches from shot to shot with a straight cut. There are no fancy transitions which shows this film is serious and to the point. The shots change quickly as in war, anything can happen that can change the outcome of who wins.
Thursday, 10 October 2013
Peer Analysis of Juno
Group
|
How was the use of camera shots?
|
Use of editing?
|
Use of lighting?
|
Overall success of video
|
Emma Rolfe
James Clifford
Becky Stanway
|
When filming the opening, the camera was quite shaky. Most of the
shots were good and looked the same.
|
|||
Dom
Punt
Lara Eardley
|
Some shots were not in the film. The filming was also quite shaky. First shot was very shaky.
|
|||
George Brewer
Katilyn Jarvis
Sarah
Marez
|
Looked very good and very little movement of the camera. I liked how you used Katilyn as the runners.
|
|||
James Braddy
Megan Larner
|
Not very shaky which is good as it looked better.
|
Friday, 4 October 2013
Camera and Angle Shots
In class we looked at the different types of camera angles and shots that are used in films. Here are a few of them with their abbreviations.

Pan Shot
This shot would be used when setting the scene and showing the area where the scene is being in.
Crane Shot
This shot would be used to do shots that sweep through city's or move up a wall.

High Angle Shot
This is a shot from a high angle, you would use this to look down on people or to create the effect of lonelyness.

Low Angle Shot
A low angle shot would be used to make characters seem bigger, stronger and more powerful.
A low angle shot would be used to make characters seem bigger, stronger and more powerful.
Extreme Close Up (ECU)
This shot is used to see small detail such as an eye or small text.

Close Up (CU)
This shot is used to show details on a characters face and to show their expressions.

Medium Long Shot (MLS)
This shot is used to show most of the character, normally from above the knee.

Long Shot (LS)
A long shot is used to show the whole of the character and some of the scenery around him or her.

Extreme Long Shot (ELS)
An extreme long shot is normally used to show the surrounds around the character. It can set the scene.

Over the Sholder Shot (OSS)
An over the shoulder shot is used when you look over the shoulder of a character. Used mainly in dialouge.

A two shot is when you have two characters in the same shot. This is normally when they are talking. You can also have a three shot, four shot etc...
Subscribe to:
Comments (Atom)